



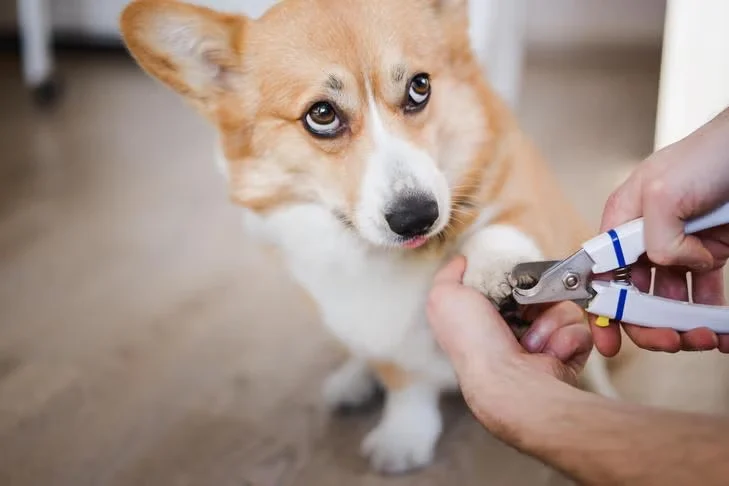
Dog Nail Trimming Safety 9 Tips Every Owner Should Know
Have you ever picked up the clippers only to see your dog hide under a table? Nail care can make owners nervous too. One wrong cut may cause pain, bleeding, and a lasting fear of having the paws touched.
However, dog nail trimming becomes much easier when you understand nail anatomy and work in small steps. A calm setup, sharp tools, and frequent rewards can turn an upsetting task into a simple part of your dog’s care routine.
This guide explains how to recognize overgrown nails, avoid the sensitive quick, work with black nails, and manage a minor accident. You will also learn when home care is safe and when a veterinarian or groomer should take over.
Why Dog Nail Trimming Matters More Than Appearance
Healthy nails support comfortable paws. When nails become too long, they may press against the floor, catch on fabric, or curve toward the paw pads.
Long nails are also more likely to split or tear. A broken nail can expose sensitive tissue, causing pain and bleeding.
Dewclaws need special attention because they sit higher on the leg and rarely touch the ground. Without natural wear, they may grow in a circle and eventually press into the skin.
Moreover, senior dogs may be more affected by overgrown nails. A dog with arthritis or weak legs already has difficulty balancing, so added pressure around the toes can make standing less comfortable.
Regular nail checks also help owners notice other problems, including:
- Cracked or split nails
- Swelling around the nail bed
- Red skin between the toes
- Objects trapped in the paw
- Unusual nail colour
- Licking or chewing caused by discomfort
- Nails beginning to enter a paw pad
In short, nail care is a useful health check as well as a grooming task.
A Fresh Approach to Dog Nail Trimming
The biggest shift in modern nail care is not a new type of clipper. It is a move toward short, calm, reward-based sessions instead of strong restraint.
Forcing a frightened dog through all four paws may finish the task today, but it can make the next session harder. The dog remembers the struggle and may react sooner when the clippers appear again.
A better goal is cooperation. Some dogs can complete a full session, while others may begin with one nail per day.
My practical rule is simple: stop one cut early rather than one cut too late. A slightly longer nail is rarely an emergency, but cutting the quick can create pain and damage trust.
Learn the Anatomy Before Picking Up Clippers
Every dog nail has a hard outer shell and a living centre called the quick. The quick contains blood vessels and nerves.
Cutting only the hard outer area should not hurt. Cutting into the quick causes pain and bleeding.
The quick in light-coloured nails
On clear, white, or pale nails, the quick usually looks pink. Examine the nail from the side under bright light.
Plan the cut several millimetres in front of the pink area. Never place the blades directly beside it, as your dog could move when you squeeze the handles.
The quick in dark nails
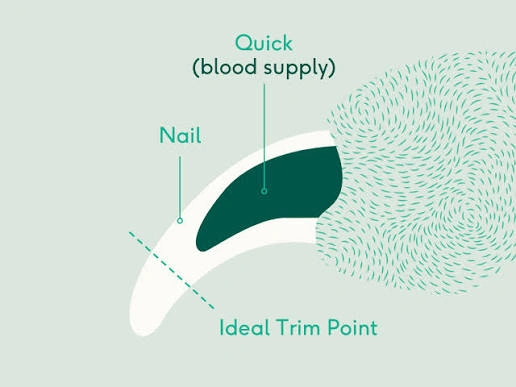
The quick cannot usually be seen through black or dark nail material. Therefore, dark nails must be shortened through several thin cuts.
After each cut, inspect the centre. At first, it may appear dry, pale, or flaky. As you approach the quick, the centre can become darker, smoother, or slightly shiny.
Stop when you notice this change. If you are uncertain, leave the nail alone and move to the next one.
How to Tell When Your Dog’s Nails Are Too Long
Many owners rely on the clicking sound they hear when a dog walks across a hard floor. Clicking can be a useful clue, but it should not be the only test.
Some dogs naturally make light contact with the floor. Others have feet and nail shapes that produce more sound.
Look for several signs together:
- The nails press firmly against the floor while the dog is standing.
- The toes appear spread or pushed upward.
- The nail tip has developed a long hook.
- The dog frequently snags its nails on rugs or blankets.
- The dewclaws are curving toward the skin.
- The dog pulls away when a nail is touched.
- One or more nails have begun to split.
For example, an active Labrador that walks on concrete may wear down its front nails naturally. An older indoor spaniel walking mostly on carpet may need more frequent care.
Check the paws once a week, even if a full trim is not due. A quick inspection allows you to catch excessive growth before it becomes difficult to manage.
Essential Dog Nail Trimming Tools
The correct equipment improves control and reduces the chance of injury. Prepare everything before bringing your dog into the grooming area.
Your basic kit should include:
- Sharp dog nail clippers in the correct size
- A pet nail grinder or manual file
- Pet-safe styptic powder
- Small, high-value treats
- Bright lighting
- A non-slip mat
- A clean towel
- A helper, if your dog is comfortable with that person
Never use ordinary household scissors. They are not shaped for canine nails and may squeeze, crush, or split the shell.
Comparing nail-care tools
| Tool | Best feature | Main concern |
| Scissor-style clippers | Fast, clean cuts | Can remove too much at once |
| Guillotine clippers | Easy on smaller nails | Nail placement may be difficult |
| Pet nail grinder | Removes thin layers | Noise and vibration may cause fear |
| Manual file | Quiet and gentle | Takes longer on thick nails |
Choose a tool that feels stable in your hand. Practice opening and closing the clippers before touching your dog.
You can even practice on dry pasta or thin wooden sticks. This helps you understand how much pressure the handles require.
Prepare Your Dog Before the First Cut
A successful session begins before any nail is shortened. Your dog should first learn that paw handling and grooming tools lead to rewards.
Choose a quiet room without visitors, children running around, or other pets creating distractions. Place your dog on a rug, yoga mat, or another surface that offers secure footing.
Start with the shoulder rather than grabbing the foot. Slide your hand slowly down the leg, touch the paw briefly, and offer a treat.
Over several sessions, follow this progression:
- Touch the shoulder and reward.
- Move your hand down the leg and reward.
- Hold the paw for one second.
- Touch one toe.
- Show the clippers.
- Place the closed clippers near a nail.
- Touch the tool to the nail.
- Remove one tiny piece.
- Give a high-value reward and take a break.
This method may seem slow. However, it saves time later because a relaxed dog is easier and safer to handle.
Dog Nail Trimming: A Safe Step-by-Step Method
Once your dog accepts paw handling, you can begin the actual session. Work slowly and examine every nail before making a cut.
1. Inspect the paw
Look for redness, swelling, cracks, bleeding, or discharge. Check between the toes and around each pad.
Do not clip a nail that appears infected, badly broken, or painful. These problems should be examined by a veterinarian.
2. Position your dog comfortably
Small dogs may sit beside you or on your lap. Larger dogs can stand or lie on a non-slip surface.
Support the leg in a natural position. Do not pull it far backward or twist the paw simply to improve your view.
3. Move long hair aside
Fur can hide the cutting line. Gently separate long hair so the entire nail is visible.
When using a grinder, hold the fur away from the rotating head. Loose hair can become trapped and pulled.
4. Identify your cutting point
On a light nail, locate the pink quick and leave a clear safety gap. On a dark nail, begin at the narrow tip.
Owners searching for how to cut dog nails often expect one large cut. In reality, several small cuts provide much better control.
5. Clip a thin section
Place the blades around the tip and make one smooth cut. Avoid slowly squeezing dull clippers, as this can put uncomfortable pressure on the nail.
If your dog suddenly moves, release the paw rather than holding it more tightly. Let the dog settle before trying again.
6. Pause and inspect
Look directly at the new surface. If it remains dry and pale, another tiny cut may be possible.
Stop when the middle becomes dark, smooth, or shiny. This pause-and-check method is especially important for black nails.
7. Reward immediately
Offer a treat after every successful cut. The reward should appear within a second or two, helping the dog connect calm behaviour with something pleasant.
You do not need to finish every paw. Two relaxed nails are more valuable than 18 nails completed through fear.
8. Smooth sharp edges
A fresh cut may leave rough corners. Use a manual file or brief contact with a grinder to soften them.
Do not continue filing if your dog becomes restless. Normal walking will often smooth minor edges naturally.
How to Work Safely With Black Nails
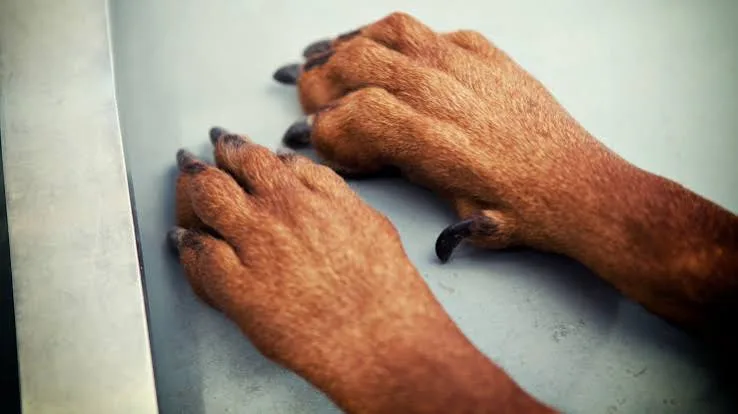
Dark nails can make owners nervous because there is no clear pink line. However, patience and strong lighting make them manageable.
Begin at the narrow end and remove a very thin layer. Examine the cross-section before cutting again.
You may notice a small dark spot forming in the centre. The surface may also look less chalky and more like a smooth dot.
These changes warn that the quick is close. Stop even if the nail still looks longer than you would prefer.
A pet grinder can offer more control because it removes material gradually. Still, it must be used carefully.
Touch the grinder to the nail for only a few seconds at a time. Friction produces heat, so allow the nail to cool between passes.
Moreover, introduce the sound slowly. Turn the grinder on from a distance, reward calm behaviour, and move it closer across several short sessions.
Prevent Fear During Dog Nail Trimming
A dog does not need to bite or growl to be frightened. Early stress signals are often much quieter.
Watch for:
- Turning the head away
- Repeated yawning
- Lip licking
- Flattened ears
- A tucked tail
- Pulling the paw back
- Sudden panting
- Refusing treats
- Trembling or freezing
Stop when you notice these signals. Continuing may turn mild concern into panic.
Never punish a growl. Growling is communication, and it gives you a chance to pause before the situation becomes unsafe.
Also avoid secretly clipping while the dog is distracted by food. The method may work once, but the sudden cut can teach the dog that treats near grooming tools are untrustworthy.
Instead, let your dog see each step. Reward calm participation, keep sessions short, and progress at a pace the dog can manage.
What to Do If You Cut the Quick
Even experienced owners can occasionally cut too deeply. Preparation helps you respond without panic.
If the nail begins bleeding:
- Stop clipping immediately.
- Speak to your dog in a calm voice.
- Apply pet-safe styptic powder to the nail.
- Hold gentle, steady pressure.
- Keep the dog quiet while a clot forms.
- Prevent running or rough play for a while.
Cornstarch may help with a very minor cut if styptic powder is unavailable. However, a pet-safe clotting product is more reliable and should be kept beside your clippers.
Contact a veterinarian if the bleeding is heavy, repeatedly restarts, or does not stop with pressure. Veterinary care is also needed if the nail splits or your dog remains in severe pain.
Managing Severely Overgrown Nails
Very long nails should not be shortened to their ideal length during one session. As a nail grows, the quick may extend farther toward the tip.
A large cut could therefore remove living tissue. Instead, take off small amounts on a regular schedule.
For example, you might shorten the tips slightly every one or two weeks until the nails reach a safer length. The exact schedule depends on the dog and should never involve cutting into sensitive tissue.
If a nail has curled into the paw pad, do not attempt to pull or clip it free at home. The area may be infected and painful.
A veterinarian can remove the embedded section safely, treat the wound, and check whether medication is needed.
How Often Should Nails Be Trimmed?
Many dogs need attention about every three to four weeks, although the right schedule varies. Some fast-growing nails require weekly maintenance.
Activity makes a difference. Dogs walking on pavement may wear down certain nails, while dogs spending more time on grass, carpet, or soft soil receive less natural wear.
Age matters too. Senior dogs may exercise less and develop longer nails more quickly. Puppies often need frequent, tiny trims because their nails grow fast and can be sharp.
Create a simple monthly reminder, but inspect the paws weekly. The condition of the nails should guide your schedule more than the calendar.
When Professional Help Is the Safer Choice
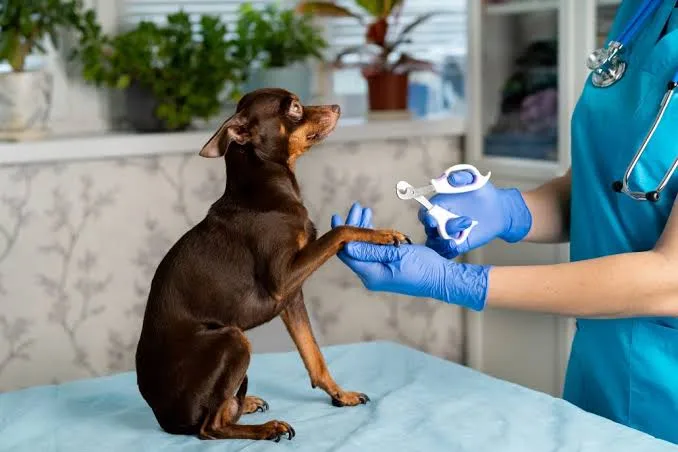
Home care is useful, but it is not always the safest answer. Seek professional help when:
- The nails are extremely thick or curled
- A nail has entered the paw pad
- You cannot identify a safe stopping point
- Your dog panics or attempts to bite
- A nail is infected or badly split
- The paw is swollen or painful
- Your dog has a bleeding condition
- Previous clipping caused lasting fear
A groomer may handle routine nails that are difficult to clip. A veterinarian is more appropriate when there is pain, injury, infection, or severe anxiety.
Some frightened dogs benefit from a behaviour plan or prescribed medication. Never give human calming products or sedatives without veterinary instructions.
Conclusion
Safe dog nail trimming depends on preparation, good lighting, sharp tools, and small cuts. Understanding the quick is essential, especially when working with dark or overgrown nails.
However, technique is only part of the process. Your dog’s emotional comfort also matters. Short sessions, steady rewards, and respectful handling can prevent fear from developing.
Remember that you do not have to finish every nail in one day. Stop when your dog becomes stressed, and seek professional care when a nail appears painful or unhealthy.
The main takeaway is simple: control matters more than speed. With patience and regular checks, nail care can become a calm routine that protects your dog’s paws and strengthens trust.
Frequently Asked Questions
What is the best way to trim dog nails?
Use sharp dog-specific clippers and remove thin pieces from the tip. Check the surface after every cut, avoid the quick, and reward your dog throughout the session.
Is it better to file or cut dog nails?
Both methods can be safe. Clippers work quickly, while files and grinders offer gradual control. The better choice is the tool your dog accepts and you can use confidently.
When should I trim my dog’s nails?
Check the paws weekly and trim when the nails press against the ground, form long hooks, or begin to snag. Many dogs need care every three to four weeks.
How do I shorten my dog’s nails quickly?
Severely overgrown nails should not be shortened in one session because the quick may be long. Remove small amounts regularly or ask a veterinarian or groomer for help.
⭐ Make MindLiva Your Preferred Source on Google
Get trusted health, wellness, and lifestyle articles from MindLiva.
Add MindLiva
Samie Babaei is a medical science student at Shahid Beheshti University of Medical Sciences with a strong interest in health, wellness, and medical research. As a health writer and researcher at MindLiva, she focuses on creating clear, evidence-based content that helps readers better understand health and well-being.