



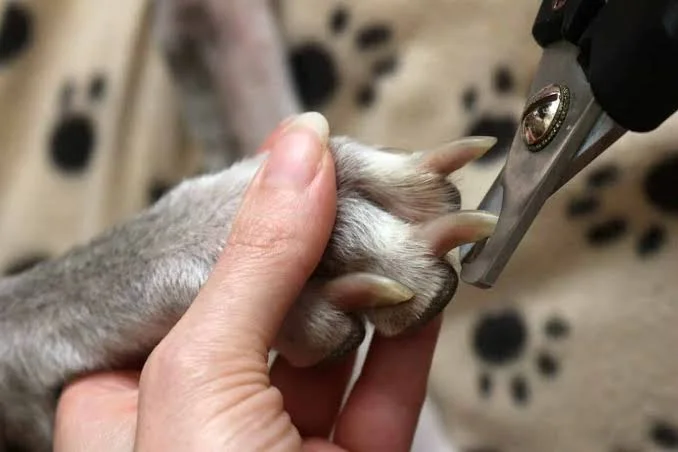
How to clip dog nails to prevent injury and discomfort
Does your dog disappear as soon as the nail clippers come out? You are not alone. Many dogs dislike having their paws handled, while owners often worry about cutting too deeply and causing pain.
Learning how to clip dog nails safely makes routine paw care easier for both you and your pet. It can reduce the risk of nails breaking, catching on fabric, or curling toward the paw pads.
In this guide, you will learn how to identify the safe cutting area, choose a suitable tool, handle dark nails, and respond if a nail starts bleeding. You will also discover a gentle training method for dogs that pull away, shake, growl, or refuse to cooperate.
Why regular nail care matters
A dog’s nails are more than a cosmetic detail. When they become very long, they can catch on carpets, blankets, grass, and furniture. A snagged nail may crack or tear, exposing the sensitive tissue underneath.
Overgrown dewclaws require special attention. These higher nails do not usually touch the ground, so walking cannot wear them down. If ignored, a dewclaw may curl toward the skin and eventually enter the paw pad.
Long nails may also make standing and walking uncomfortable, particularly for senior dogs and pets with existing joint problems. Some dogs may spread their toes or adjust their stance to avoid pressure from nails that touch the ground.
However, nail length should be judged by more than sound alone. Clicking on a hard floor can be a useful warning, but it does not always mean the nails are dangerously long.
Look at your dog while it is standing naturally. Nails that press firmly against the floor, curve sharply, snag regularly, or approach the paw pads need attention.
Regular clipping also helps keep the living tissue inside each nail at a manageable length. When nails remain overgrown for months, that tissue may extend farther toward the tip. This limits how much nail can safely be removed at one time.
Understand the quick before clipping
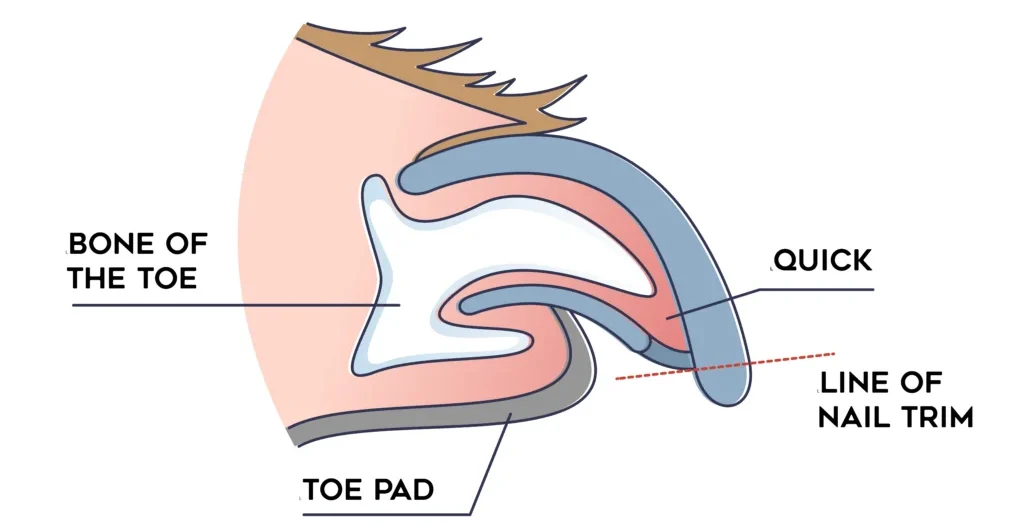
Each dog nail contains a hard outer shell and a sensitive inner area called the quick. The quick contains nerves and blood vessels. Cutting into it causes pain and bleeding.
On white, clear, or pale nails, the quick normally appears as a pink area inside the shell. You should leave a small safety gap between this pink section and your cutting point.
Dark nails are more challenging because the quick cannot be seen from the outside. Therefore, you must remove very small pieces and examine the cut surface after every clip.
The safe section is usually the narrow or hooked tip. On pale nails, stop several millimetres before the visible pink tissue. On dark nails, watch for changes in the colour and texture of the nail’s centre.
A dry, pale, or flaky centre often means you still have some room. A darker, smoother, or slightly shiny centre can indicate that you are approaching the quick.
Tools needed to clip dog nails safely
Prepare your equipment before bringing your dog into the grooming area. Leaving halfway through the session can make an already nervous dog more alert.
You may need:
- Dog-specific nail clippers
- A pet nail grinder or manual file
- Bright lighting or a headlamp
- Small, high-value treats
- A non-slip mat
- Pet-safe styptic powder
- A clean towel
- A calm helper, if necessary
Choose clippers that match your dog’s size. Small clippers may not cut a large dog’s thick nails cleanly, while oversized clippers can be difficult to control around a small paw.
Sharp blades create a fast, clean cut. Dull blades may squeeze, crush, or split the nail, causing discomfort even when the quick is not touched.
Clippers versus a nail grinder
| Tool | Main advantage | Possible drawback |
| Scissor-style clippers | Fast and easy to control | Can remove too much in one cut |
| Guillotine clippers | Useful for smaller nails | Correct placement can be difficult |
| Pet nail grinder | Removes thin layers gradually | Noise and vibration may cause fear |
| Manual nail file | Quiet and gentle | Slow on thick nails |
A grinder can smooth sharp edges and provide more control over dark nails. However, the rotating head creates heat through friction.
Touch the grinder to the nail for only a few seconds at a time. Pause between passes so the nail can cool.
Moreover, keep long fur away from the moving head. Loose hair can become tangled in the tool and pull painfully against the skin.
How to prepare your dog for nail clipping
Do not begin by grabbing your dog’s paw and immediately making a cut. First, teach your pet that paw handling leads to something pleasant.
Choose a quiet room without people walking in and out. Place your dog on a rug, yoga mat, or another non-slip surface. Stable footing can make a nervous animal feel safer.
Use the following training sequence:
- Touch your dog’s shoulder and offer a treat.
- Slide your hand gently down the leg.
- Touch the paw briefly and reward calm behaviour.
- Hold one toe for a second.
- Show the clippers without using them.
- Touch the closed clippers to a nail.
- Make one tiny cut and provide a special reward.
- End the session while your dog is still relaxed.
Repeat each stage until your dog accepts it comfortably. Some dogs progress within a few days, while fearful dogs may require several weeks.
Watch your dog’s body language throughout the process. Turning away, repeated yawning, lip licking, flattened ears, trembling, pulling back, refusing food, growling, or snapping can all signal stress.
If these signs appear, pause the session. Return to an easier step the next time instead of pushing forward.
How to clip dog nails step by step
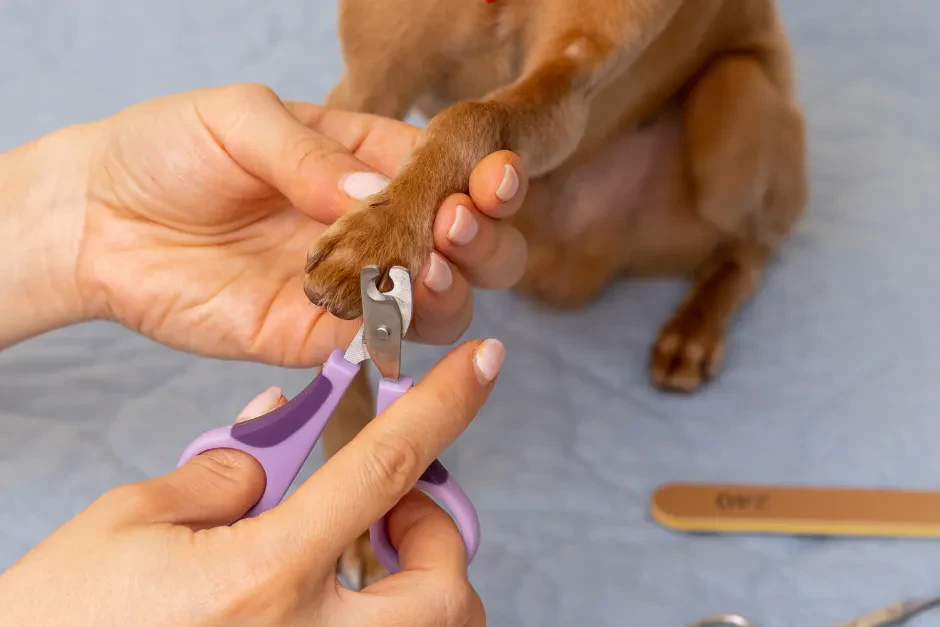
Once your dog accepts paw handling and the sight of the equipment, you can begin clipping. Work slowly and do not expect to finish every nail in one sitting.
1. Inspect every paw
Look for broken nails, redness, swelling, discharge, unusual colour, or signs of pain. Check between the toes and around the paw pads as well.
If a nail is infected, badly cracked, embedded in the pad, or painful to touch, contact a veterinarian. These problems need more than routine home grooming.
2. Choose a comfortable position
Small dogs may sit beside you or on your lap. Larger dogs can stand or lie on a non-slip mat.
Support the leg without twisting it backward. Hold the paw firmly enough to control sudden movement, but do not squeeze the toes.
Your dog should be able to remain in a natural position. If it struggles constantly, stop and reconsider your setup.
3. Move long fur away
Long hair may hide the nail and block your view of the cutting line. Carefully move the hair back before placing the clippers.
This step is even more important when using a grinder. Hold long fur away from the rotating head during the entire process.
4. Find the safe cutting area
With a pale nail, look from the side and identify the pink quick. Plan your cut several millimetres ahead of it.
With a dark nail, begin at the pointed tip. Never make a deep cut based only on how long the nail looks.
5. Remove a tiny piece
Position the clipper around the hooked end of the nail. Make one smooth, controlled cut.
People learning how to cut dog nails sometimes try to reach the final length immediately. However, several small cuts are far safer than one large cut.
6. Check the cut surface
Look directly at the centre of the nail after every clip. If the surface remains pale, dry, and flaky, you may be able to remove another thin section.
Stop when the centre becomes darker, smoother, or shiny. That change can mean the sensitive area is close.
When uncertain, stop. Leaving one nail slightly longer is much better than cutting the quick.
7. Check every dewclaw
Look inside each front leg for dewclaws. Some dogs also have them on their back legs.
Since dewclaws receive little natural wear, they may become surprisingly long. Clip only the curved tip while following the same safety rules.
8. Smooth rough edges
Freshly clipped nails can have sharp corners. Use a manual file or brief contact with a grinder to smooth them.
Do not chase a perfectly rounded shape if your dog is becoming restless. The edges will also soften naturally through normal activity.
9. Reward your dog
Offer praise and a small treat after each successful nail. If your dog becomes tense after two or three nails, finish the session.
Clipping one or two relaxed nails per day may be more effective than forcing all four paws in a single stressful appointment.
How to clip dog nails when they are black
Black nails require patience rather than a completely different method. Begin by clipping only the pointed tip and then inspect the exposed surface under strong light.
Take off another thin layer only if the centre looks dry and pale. As you get closer to the quick, a small dark spot may appear in the middle.
The surface may also become smoother or slightly shiny. Stop immediately when you notice this change.
A nail grinder can be useful for thick black nails because it removes thin layers gradually. However, some dogs are more frightened by its sound than by clippers.
Introduce the grinder while it is switched off. Next, turn it on from across the room and offer treats. Gradually bring it closer over several sessions.
When your dog remains relaxed near the sound, touch the grinder to one nail for less than a second. Reward your dog and stop. Increase the contact time slowly.
If you cannot recognize the stopping point, ask a professional to demonstrate. Black nails leave less room for guessing.
How to make clipping less painful
The least painful method combines sharp tools, tiny cuts, stable footing, frequent rewards, and respect for the dog’s limits.
Never punish your dog for pulling away or growling. A growl communicates that the animal feels frightened or unsafe.
Punishing that warning does not remove the fear. Instead, it may cause the dog to react more suddenly during a future session.
Keep early appointments short. A training session may last only 15 seconds, while an actual clipping session may stop after one nail.
Moreover, do not distract a frightened dog with food and secretly clip a nail. This may work once, but it can damage trust.
Let your dog see the tool and understand what is happening. Provide the treat immediately after each accepted step.
Common mistakes that can cause injury
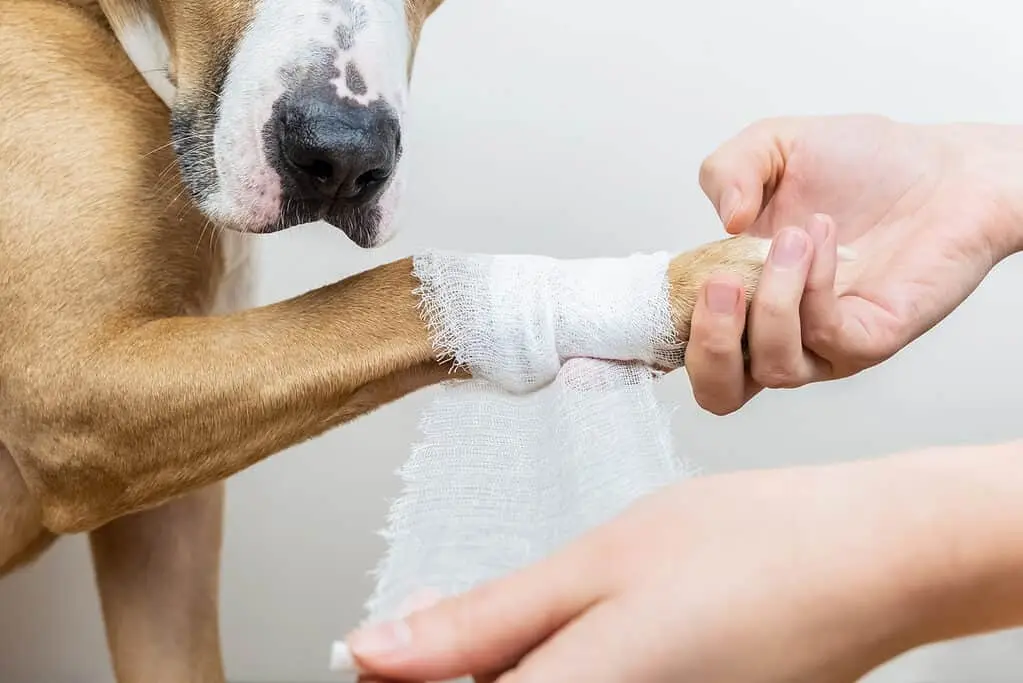
Even careful owners can make errors. Most problems happen because the person moves too quickly or begins without proper preparation.
Avoid these common mistakes:
- Cutting a large piece from a dark nail
- Using dull, rusty, or damaged clippers
- Forgetting the dewclaws
- Twisting the leg into an unnatural position
- Continuing after the dog shows strong fear
- Grinding one area until it becomes hot
- Allowing long hair to touch the grinder
- Trying to shorten severely overgrown nails at once
- Starting without styptic powder nearby
- Using ordinary household scissors
Household scissors are not shaped for thick canine nails. They may crush or split the shell instead of producing a clean cut.
You should also avoid clipping when your dog is highly excited. Allow the animal to settle after exercise or play before handling its paws.
What to do if you cut the quick
Stay calm if a nail starts bleeding. A loud or frightened reaction from you may make the situation more upsetting for your dog.
Apply pet-safe styptic powder directly to the exposed nail. Use gentle, steady pressure and keep your dog quiet while the bleeding stops.
Cornstarch may provide temporary help for a minor cut when styptic powder is unavailable. However, keeping a proper clotting product in your grooming kit is safer.
Do not allow your dog to run immediately afterward. Movement may disturb the clot and restart the bleeding.
Seek veterinary care if the bleeding is heavy, continues despite pressure, or repeatedly starts again. Professional care is also necessary if the nail splits, severe pain continues, or swelling appears later.
How often should dog nails be clipped?
There is no single schedule for every dog. Nail growth, age, activity level, surface type, health, and genetics all influence how often clipping is needed.
Many dogs need their nails checked and shortened every three to four weeks. Others may require weekly maintenance, especially if their nails grow quickly.
Dogs that regularly walk on rough ground may wear down some nails naturally. However, this natural wear may be uneven, and it does not normally affect the dewclaws.
Check every paw once a week. Look for nails that touch the ground, curve sharply, snag frequently, or approach the pads.
A weekly check also helps you notice broken nails, swelling, cuts, or objects trapped between the toes before they become serious problems.
What if the nails are severely overgrown?
Do not try to return severely overgrown nails to a short length in one appointment. The quick may have extended farther down the nail, leaving very little safe material to remove.
Instead, clip small amounts regularly. As the nails become shorter over time, the sensitive inner area may gradually move back.
This process can require several appointments. Patience protects your dog from unnecessary pain and prevents a frightening experience.
Professional help is needed if a nail has entered the paw pad, changed colour, developed an odour, or caused limping. A veterinarian should also examine sudden nail changes affecting several toes.
When should a professional take over?
Home nail care is not appropriate in every situation. Ask a veterinarian or qualified groomer for help when:
- You cannot identify a safe cutting point
- The nails are extremely thick or curled
- Your dog panics, snaps, or attempts to bite
- A nail is broken, infected, or bleeding
- Paw handling appears painful
- Your dog has a known bleeding problem
- A previous injury created lasting fear
- The nail has grown into the paw pad
Dogs with severe anxiety may need a gradual behaviour plan. In some cases, a veterinarian may recommend prescription medication or light sedation.
Never give a dog human sedatives or calming medicine without veterinary instructions.
Conclusion
Learning how to clip dog nails comes down to preparation, patience, and small decisions. Use a sharp dog-safe tool, work under bright light, remove thin pieces, and stop before reaching the quick.
Most importantly, listen to your dog. Short, calm sessions build trust and make future nail care easier. If a nail looks unhealthy or your dog becomes extremely frightened, professional help is the safest choice.
In short, successful dog nail trimming is not measured by how many nails you finish. It is measured by whether you protect the paw, prevent unnecessary pain, and leave your dog feeling safe enough to try again.
Frequently asked questions
What part is not to cut on dogs’ nails?
Do not cut the quick, which contains nerves and blood vessels. It appears pink inside pale nails. With black nails, remove tiny sections and stop when the centre becomes darker or shiny.
What is the least painful way to trim a dog’s nails?
Use sharp, correctly sized clippers or a pet grinder and remove very small amounts. Provide stable footing, reward calm behaviour, and stop when your dog shows stress.
What happens if I don’t cut my dog’s nails?
The nails may curl, split, snag, or grow toward the paw pads. Very long nails can also make standing uncomfortable and limit natural paw placement.
What can I use instead of dog nail clippers?
A pet nail grinder or strong manual file can shorten and smooth the nails. Introduce a grinder slowly and use brief contact to prevent heat.
What to do if your dog won’t let you cut their nails?
Stop forcing the procedure and begin gradual paw-handling practice with treats. If your dog trembles, growls, snaps, or panics, seek help from a veterinarian or an experienced groomer.
⭐ Make MindLiva Your Preferred Source on Google
Get trusted health, wellness, and lifestyle articles from MindLiva.
Add MindLiva
Samie Babaei is a medical science student at Shahid Beheshti University of Medical Sciences with a strong interest in health, wellness, and medical research. As a health writer and researcher at MindLiva, she focuses on creating clear, evidence-based content that helps readers better understand health and well-being.