



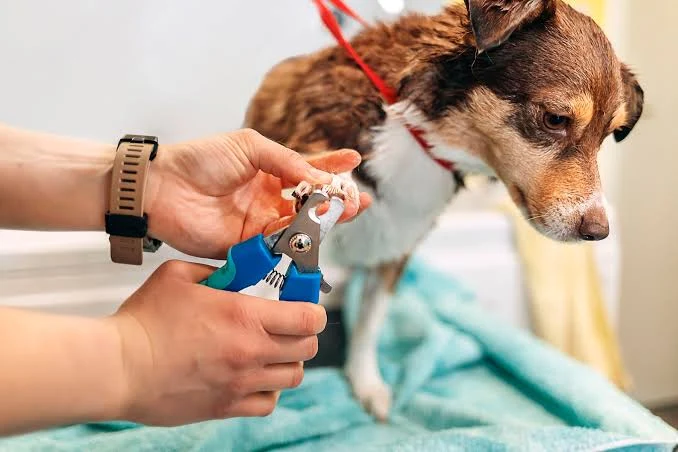
How to Cut Dog Nails: Step-by-Step Guide for Beginners
Have you ever picked up a dog nail clipper, looked at your dog’s paws, and suddenly wondered whether you should leave the job to a professional?
You are not alone. Many owners feel nervous because cutting a nail too short can cause pain and bleeding. However, nails that become too long can also affect a dog’s comfort, posture, and movement.
Learning how to cut dog nails is therefore an important part of responsible pet care. With patience and the correct technique, most owners can safely maintain their dog’s nails at home.
In this guide, you will learn how to choose the right tools, find the quick, position the clippers, trim dark nails, and help a nervous dog feel more comfortable.
Why Regular Nail Care Matters
A dog’s nails continue growing throughout its life. Walking on pavement may wear them down slightly, but it usually does not keep every nail at a healthy length.
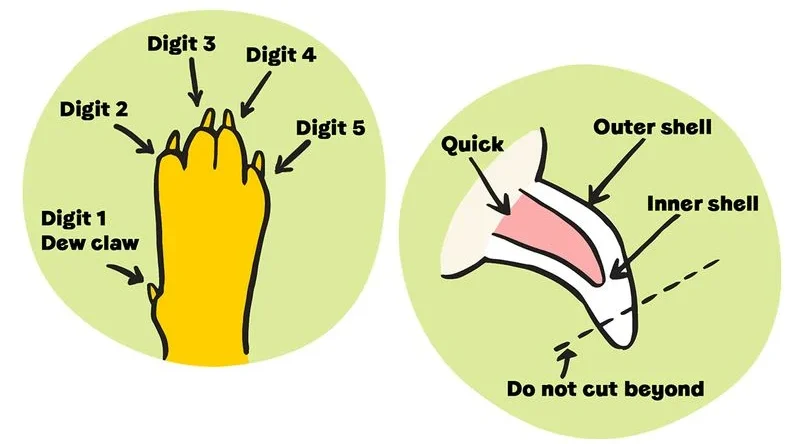
This is especially true for dewclaws. Because these nails sit higher on the leg, they rarely touch the ground and can eventually curve into the skin.
Overgrown nails may:
- Make walking uncomfortable
- Change how the paws meet the ground
- Reduce grip on smooth floors
- Place extra pressure on toes and joints
- Catch on blankets, carpets, or furniture
- Split or tear during exercise
- Curl toward the paw pad
You may hear a clicking sound when your dog walks across a hard floor. That sound often indicates that the nails need attention, although paw shape and breed differences should also be considered.
Moreover, long nails can allow the quick—the living tissue inside the nail—to grow farther toward the tip. This makes future trimming more difficult because less dead nail can be safely removed at one time.
How Often Should You Cut Your Dog’s Nails?
There is no single schedule that works for every dog. Nail growth depends on age, activity level, walking surfaces, health, and genetics.
Many dogs need a trim approximately every three to four weeks. Active dogs that regularly walk on rough pavement may need less frequent care, while indoor dogs may need it more often.
Check your dog’s paws every one or two weeks. Look at all the nails, including the dewclaws, rather than waiting for them to become visibly long.
A nail may need trimming if:
- It touches the floor while the dog is standing normally
- It makes a clear clicking noise on hard floors
- It begins to curve downward
- It catches on fabric
- Your dog slips more frequently
- The paw position appears different
However, do not rely only on a fixed calendar. Regular visual checks are a safer way to find a routine that suits your individual dog.
Tools You Need Before You Begin
Preparing everything in advance helps the session remain calm. You do not want to hold your dog’s paw while searching for powder, treats, or better lighting.
Gather the following items:
- Dog nail clippers in the correct size
- A nail grinder or dog-safe file, if preferred
- High-value treats
- Bright lighting
- A nonslip mat or towel
- Styptic powder
- Clean gauze or cotton pads
- A second person, if your dog needs gentle support
Styptic powder helps control minor bleeding if the quick is accidentally nicked. Keep it open and within reach before making the first cut.
Guillotine Clippers vs. Scissor Clippers
Guillotine clippers have a small opening through which the nail is placed. When the handles are pressed, a blade moves across the nail.
They can work well for small or medium nails. However, some beginners find it difficult to see exactly where the blade will land.
Scissor-style clippers resemble short, strong scissors. They are often easier to position and may provide better control on thick nails.
Whichever style you choose, the blades must be sharp. Dull clippers can crush or split the nail instead of making a clean cut.
Should You Use a Nail Grinder?
A grinder removes thin layers instead of cutting off a section at once. This can provide more control, particularly when working with dark nails.
However, the sound and vibration may frighten some dogs. Introduce the tool gradually, and never hold it against one spot for too long because friction creates heat.
A grinder can also catch long fur. If your dog has hairy paws, carefully move the hair away from the rotating tip before switching it on.
Understanding the Quick Before Cutting
The quick is the sensitive inner section of a dog’s nail. It contains blood vessels and nerves, so cutting into it causes pain and bleeding.
On a clear or pale nail, the quick often appears as a pink area inside the nail. The safe trimming zone is the hollow-looking section beyond that pink tissue.
Dark nails require more caution because the quick cannot be seen from the outside. Instead, you must remove very small pieces and examine the cut surface after each one.
Never guess where the quick ends. If you are uncertain, remove less nail or ask a veterinarian or professional groomer to demonstrate the process.
How to Cut Dog Nails Safely at Home
Choose a time when your dog is relaxed. A walk or gentle play session beforehand may help release excess energy, but do not wait until your dog is overheated or restless.
Work in a bright, quiet room. Place a nonslip surface beneath your dog so it does not feel unstable.
Step 1: Help Your Dog Accept Paw Handling
Do not begin by immediately grabbing a paw and cutting a nail. First, touch your dog’s shoulder, move down the leg, and briefly hold the paw.
Give a treat after each calm response. Next, touch individual toes and gently press each pad so the nail extends.
For a worried dog, repeat this exercise over several days without using clippers. Short, positive sessions build trust more effectively than forcing the entire task at once.
Step 2: Introduce the Clippers
Allow your dog to examine the clippers without placing them near a nail. Reward calm interest.
Next, open and close the tool at a distance so your dog becomes familiar with the sound. You can then touch the closed clippers to a nail and provide another reward.
This gradual introduction may seem slow. However, it often saves time in future sessions because the dog learns that the tool does not automatically predict discomfort.
Step 3: Hold the Paw Gently but Securely
Stand or sit beside your dog rather than leaning directly over its body. Some dogs feel trapped when a person bends over them.
Support the paw without squeezing it. Keep your fingers away from the clipping area and gently separate the toe you plan to work on.
If your dog repeatedly pulls away, stop and reset. Holding the paw more tightly may increase fear and make sudden movement more likely.
Step 4: Find the Safe Cutting Point
On a pale nail, identify the pink quick and leave a small safety margin in front of it. Trim only the empty tip.
On a black nail, begin at the narrow, curved end. Remove a thin slice, inspect the surface, and then decide whether another tiny cut is safe.
As you approach the quick, the center of a dark nail may change from dry and pale to darker or glossier. A small central dot is a warning that you should stop.
Step 5: Cut Small Pieces
Position the clippers firmly before applying pressure. Make one smooth cut instead of slowly crushing the nail.
Remove only a small amount. You can always take off another thin piece, but you cannot replace a section that has already been cut.
A careful approach is especially important when learning how to clip dog nails for the first time. Finishing one or two paws safely is better than rushing through every nail.
Step 6: Smooth Sharp Edges
Freshly cut nails can have rough corners. Use a dog-safe file or grinder to smooth them, particularly if your dog scratches people or catches its nails on fabric.
Keep grinder contact brief. Touch the nail for one or two seconds, pull the tool away, and check for heat before continuing.
Step 7: Reward and End Positively
Give your dog praise and a valuable treat after each nail or each calm paw hold. The reward should arrive immediately so the connection is clear.
You do not have to complete every nail in one sitting. For a beginner or nervous dog, trimming one nail per day can be a successful starting point.
End the session before your dog becomes highly stressed. A calm ending creates a better foundation for the next attempt.
What Angle Should You Use?
Avoid cutting a large section straight across without first assessing the nail. The safest position depends partly on the nail’s natural curve and the location of the quick.
In general, remove the hooked tip while following the nail’s shape. Keep the cutting line away from the living center and take small sections from the sides and tip when needed.
The goal is not to create a perfect cosmetic shape. The goal is to shorten the dead nail without reaching sensitive tissue.
Current guidance from the American Kennel Club also recommends working gradually and avoiding the quick.
How to Cut Dog Nails When They Are Black
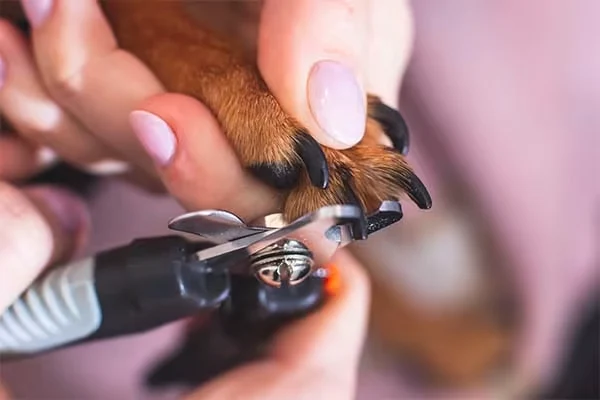
Black nails are not automatically harder to maintain, but they require a slower method because the quick is hidden.
Follow this process:
- Hold the paw under bright light.
- Identify the narrow, curved tip.
- Remove a very thin slice.
- Look directly at the newly cut surface.
- Continue only while the center appears dry and safe.
- Stop when a dark or glossy central area begins to appear.
Using a flashlight behind the nail sometimes helps, but it will not make every quick visible. Nail thickness and pigmentation can block the light.
Therefore, treat visual changes on the cut surface as your main guide. If the nail is extremely long, shorten it through frequent small sessions rather than trying to reach the ideal length immediately.
What to Do If You Cut the Quick
Even experienced owners can occasionally nick the quick. Stay calm because your dog may react to your alarm.
Apply styptic powder directly to the nail and hold gentle pressure with clean gauze. Minor bleeding usually stops after a few minutes.
If you do not have styptic powder, cornstarch may offer temporary help for a small nick. However, a proper pet first-aid product is more reliable.
Contact a veterinarian if:
- Bleeding does not stop after firm pressure
- The nail is deeply torn
- The toe becomes swollen
- Your dog remains in significant pain
- The nail was damaged near its base
- There are signs of infection
Do not continue the session after a painful cut. Comfort your dog, reward calm behavior, and allow the paw to recover.
How to Help a Dog That Hates Nail Trimming
Fear may come from a previous painful trim, sensitivity around the paws, poor balance, or discomfort from joint disease. Punishment will not solve the cause.
Instead, divide the process into very small actions:
- Show the tool
- Touch the shoulder
- Touch the leg
- Hold the paw for one second
- Touch one nail
- Place the clipper around the tip
- Trim one tiny piece
Reward each successful step. If your dog shows intense fear, growls, freezes, or tries to bite, stop and seek professional support.
A veterinarian can check for pain and discuss safe options. A force-free trainer or experienced groomer may also help create a gradual care plan.
For some dogs, a scratchboard offers another option for filing the front nails. Still, it may not maintain dewclaws or rear nails, so regular paw inspections remain necessary.
Common Mistakes Beginners Should Avoid
Most problems happen because the session moves too quickly. Good dog nail trimming is based on control, observation, and patience.
Avoid these common mistakes:
- Cutting a large section at once
- Using dull or damaged clippers
- Forgetting the dewclaws
- Trimming in poor light
- Forcing a frightened dog to remain still
- Holding a grinder against the nail too long
- Starting without styptic powder nearby
- Trying to make every nail extremely short
- Ignoring cracked, swollen, or infected nails
Moreover, never use human nail clippers on medium or large dog nails. They may not provide enough control or strength and can crush the nail.
When Professional Help Is the Safer Choice
Home care is convenient, but it is not right for every dog or every situation.
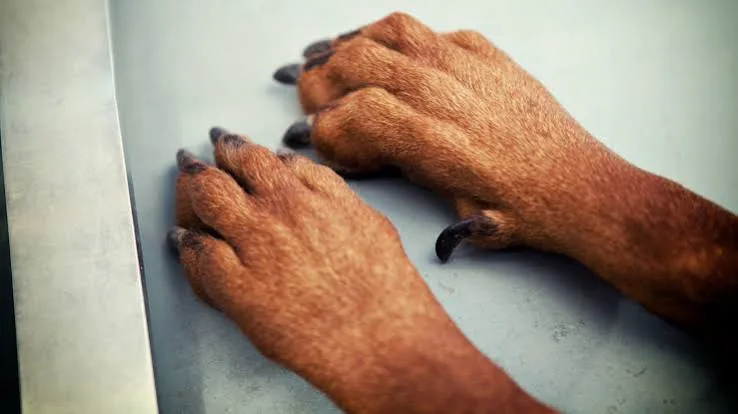
Ask a veterinarian or groomer for help if your dog has extremely overgrown nails, tightly curled dewclaws, thick deformed nails, or a history of biting during handling.
Professional help is also wise when the nails appear painful, infected, brittle, or unusually colored. These changes may need medical assessment rather than routine grooming.
Senior dogs and dogs with arthritis may struggle to stand in a trimming position. A veterinary team can suggest a safer posture and determine whether pain is contributing to resistance.
Conclusion
Learning how to cut dog nails becomes much easier when you stop treating it as one big task. Prepare the correct tools, handle the paws gently, identify the quick, and remove only small pieces.
Most importantly, work at your dog’s pace. Some dogs accept a full trim quickly, while others need several short sessions. Both outcomes are normal.
Regular care keeps the nails comfortable and makes each future session easier. Start slowly, reward progress, and ask a professional for help whenever safety is uncertain.
Frequently Asked Questions
How do you cut a dog’s nails for beginners?
Use sharp dog clippers, identify the quick, and remove only the narrow tip of each nail. Work in bright light, make tiny cuts, and reward your dog after each calm step.
Can you cut a dog’s nails at home?
Yes, many owners can safely maintain their dog’s nails at home. However, seek professional help if the nails are damaged or severely overgrown, or if the dog becomes highly fearful or aggressive.
Do you cut dog nails straight or at an angle?
Follow the natural shape of the nail and remove the curved tip in small sections. Avoid one deep, straight cut because it may reach the quick.
Is it better to trim dogs’ nails wet or dry?
Dry nails are generally easier to inspect and control with clippers. After a bath, nails may be softer, but wet paws can be slippery, so the dog must stand on a secure surface.
Is it okay to never cut dogs’ nails?
No. Although outdoor activity may wear down some nails, dewclaws and other nails can still become overgrown. Long nails may cause pain, change movement, split, or grow toward the paw pads.
⭐ Make MindLiva Your Preferred Source on Google
Get trusted health, wellness, and lifestyle articles from MindLiva.
Add MindLiva
Samie Babaei is a medical science student at Shahid Beheshti University of Medical Sciences with a strong interest in health, wellness, and medical research. As a health writer and researcher at MindLiva, she focuses on creating clear, evidence-based content that helps readers better understand health and well-being.